I like hardtails, but as I play unamplified on the sofa quite a lot, I do like the sound of the springs in the cavity even though I never use the trem and have the bridge flat to the body, usually on 4 or 5 springs.
This one there's no before pics, but you all should know what a beaten up Chinese squier looks like. This was 25 quids worth of, serial number on neck plate affinity series hss, with a knackered truss rod nut.
All the metalwork went in the rock tumbler with nuts n bolts and vinegar for a day or so, and I stamped a new "made up" number on the neck plate, (I made sure that this was a truly fake number to ensure that nobody gets ripped off in the future, I usually make a few clear "mistakes" to ensure this with all my projects).

The plastics were cracked and scored, so a bit of pretend dirt, and glue, and a shielded foil backing applied to make sturdy.
I made an adaptor to cover the humbucker cutout from a broken backplate, and screwed it on. The thinking behind this was that I've seen so many 70's strats that have been butchered and have weird individual home made repairs and adjustments over the years, when they were used for playing not collecting.
.JPG) The neck was a bit more in depth, I had to drill out the old truss rod nut and replace it, I could have taken off the fretboard and replaced the whole thing, but I thought "what would they do in the 70's?". I'll admit it, the drill slipped and a bit of a balls up occurred. So what else could I do, a truss rod cover was the only option.
The neck was a bit more in depth, I had to drill out the old truss rod nut and replace it, I could have taken off the fretboard and replaced the whole thing, but I thought "what would they do in the 70's?". I'll admit it, the drill slipped and a bit of a balls up occurred. So what else could I do, a truss rod cover was the only option.I went for an aged satin finish neck with some pretend age to it, I did give it a set of Grovers as I like them a lot, if only they had split posts they would be perfection imo. The neck was coloured with paprica and turmeric in cooking oil (be sure to wipe with acetone well before applying clearcoat) and the back given some age with the old magic wood mixture (disolve wire wool in vinegar) yo have to be careful with this, it turns bare wood black, so you need to wash it off when it gets to the shade of grey required, any digs in the wood will go black, adding to the aged patina.
.JPG)
Fretboard oiled, frets polished and levelled, neck job done.
Just a note, when applying waterslide decals,add a bit of PVA (wood and paper glue) to the water and mix in to dissolve, it helps no end with adhesion, and if you want the old style where you can see tha outline, don't put clearcoat on before the decal, if you want invisible outline, give it a couple of coats before you apply.
The body, had a poly finish, as did most of the 70's strats, this stuff is like concrete, so I threw it out of the window, and kicked it round the garden for a bit, then I knocked in the washing line post with it, and then threw it back into the flat. As you can see, this did very little actual damage to the body other than look like it had been not particularly cared for over the years.
 On to the electronical side of stuff now, into the knackered looking but structurally sound scratchplate, I stuck 3 double single humbucker thingies, and a switch to tap the bridge and neck, to allow a triple pickup front and back option as well as the standard 5 positions. The wiring was nice and tidu as usual, but you'll have to trust me on that one as no pics.
.JPG)
.JPG)
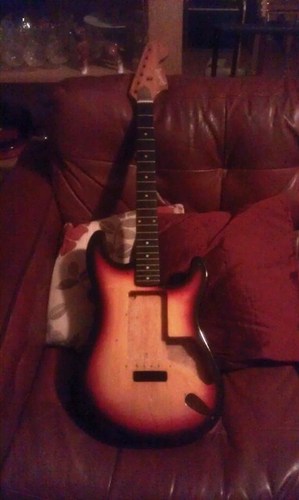
Black knobs and pickups as was the preference in the 70's, a busted up backplate, 5 springs and a setup and hey presto, a nice strat that would fool anyone at a distance into believing that it had been dragged around various dirty smoky clubs for 30 years.
Edit/Update: I forgot that I also drilled out the plastic MOP fretboard markers and replaced them with clay, now I know that when people refer to clay fret markers they mean the colour, as I think that they were originally floor tiles, but I didn't have any of those, so I used clay, looks ok to me. (see last pic)